NOTE: Before you can start using the automatic interview scheduling feature, you must make sure your calendar and the interviewer's calendar is connected and syncing with HirePlanner.com. Once your calendar is connected, you can proceed with the steps below to simplify the coordination of your interviews:
STEP 1: SELECT THE CANDIDATE (APPLICATION) YOU WOULD LIKE TO SCHEDULE AN INTERVIEW WITH
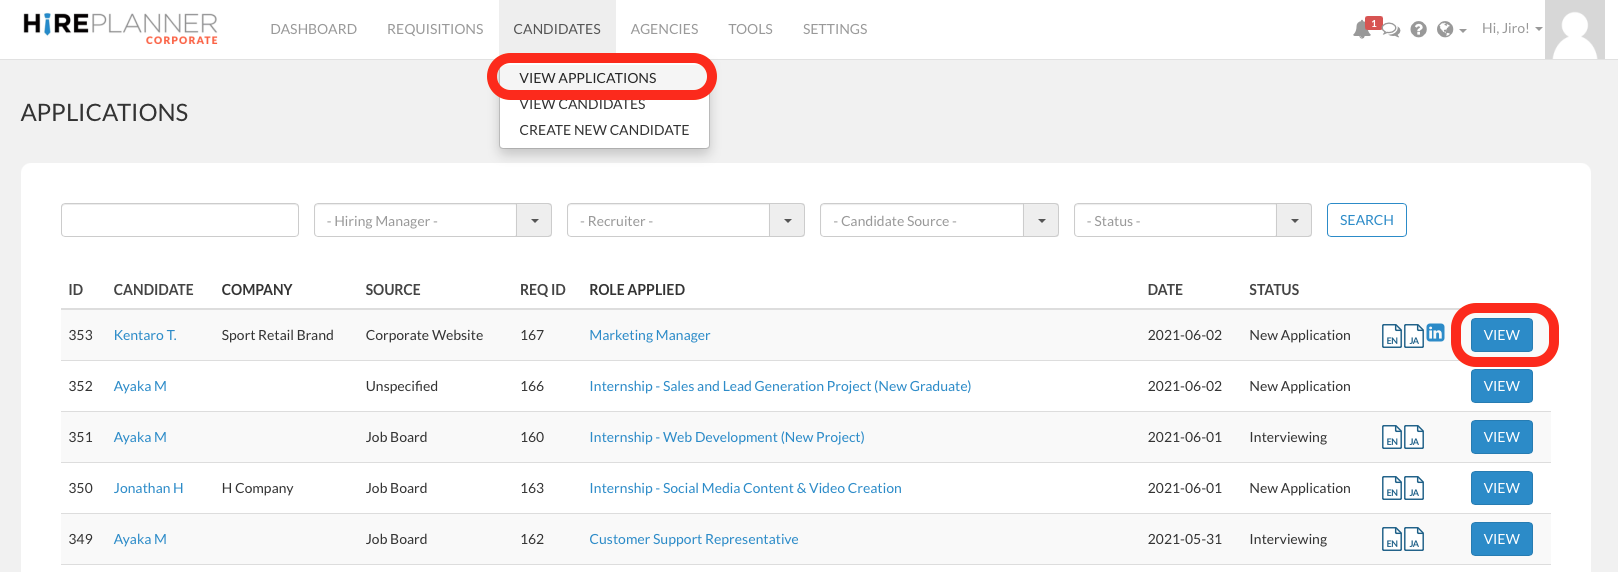
1) Click on CANDIDATES on the top navigation
2) Select "VIEW APPLICATIONS" in the drop down
3) Open the candidate application of your choice by clicking on the "VIEW" button (Blue)
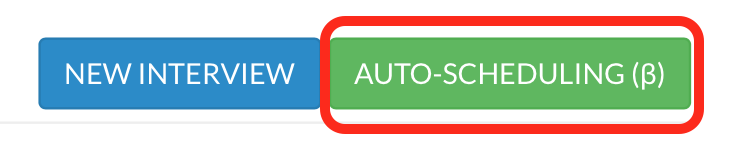
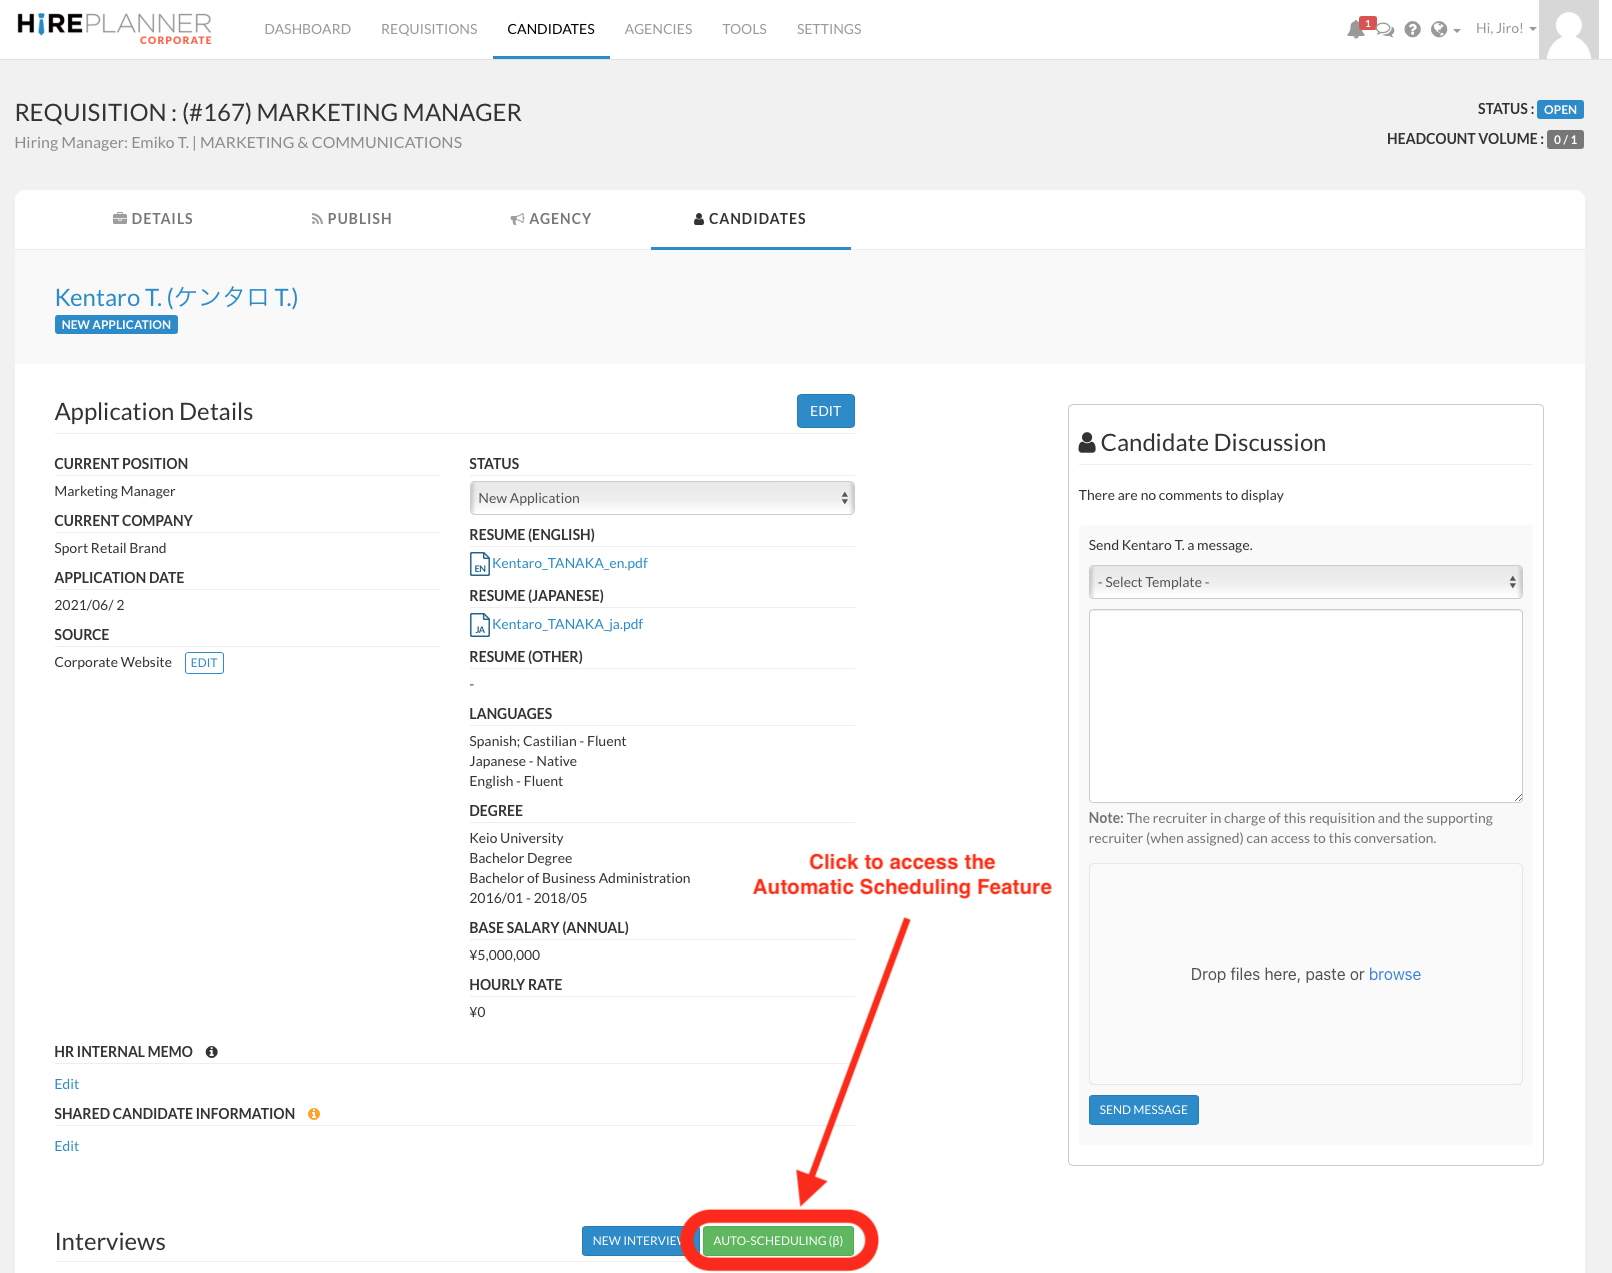
4) Scroll down to the INTERVIEWS section of the application page and click on the AUTO-SCHEDULING (β)
STEP 2: PREPARE YOUR INTERVIEW INVITE
1) Prepare your interview details by selecting the duration, the meeting type and the name of the interviewer:
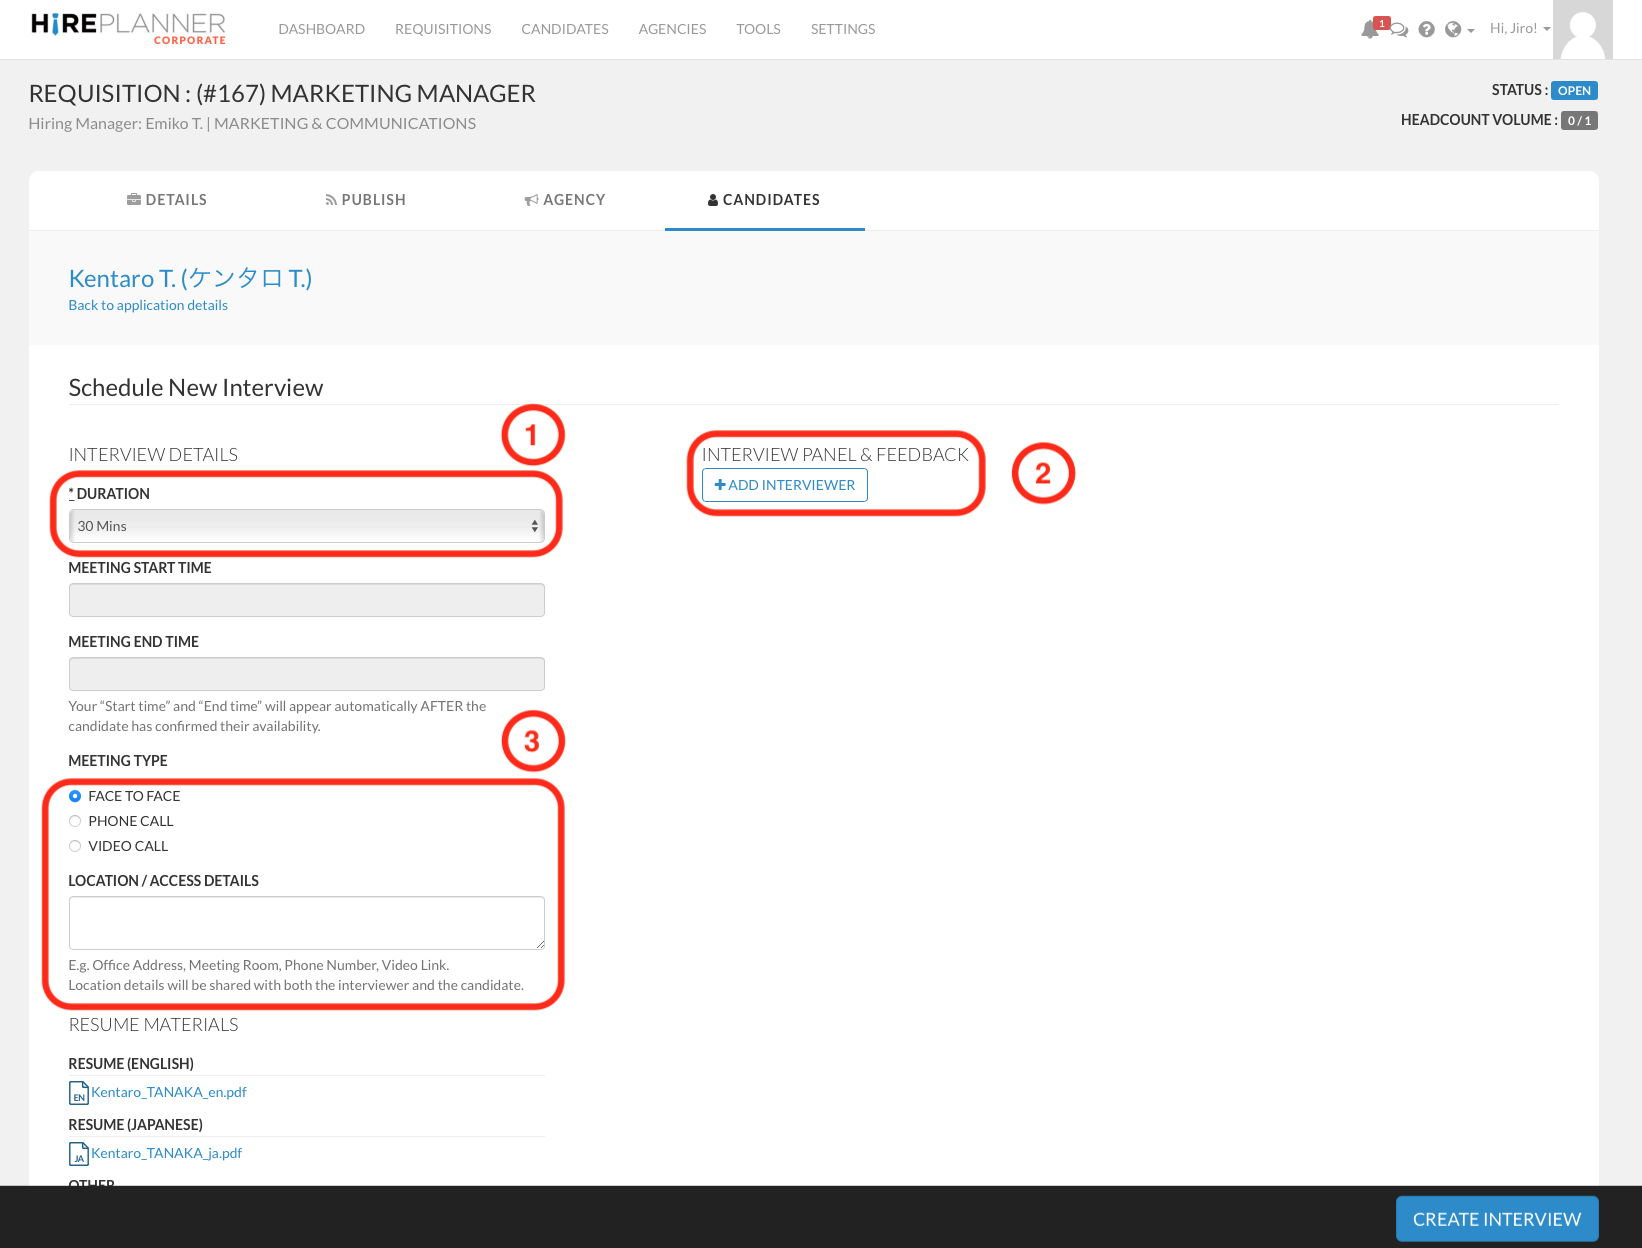
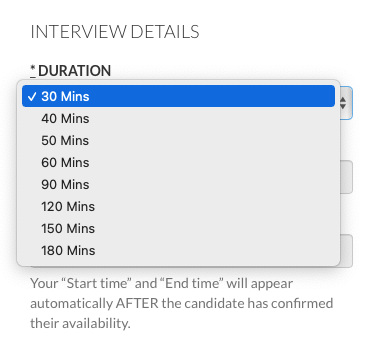
- Select the interview duration (1)
NOTE: You don't need to select a START TIME or END TIME - the candidate will select later one of the time slots you offer and the system will be automatically updated then.
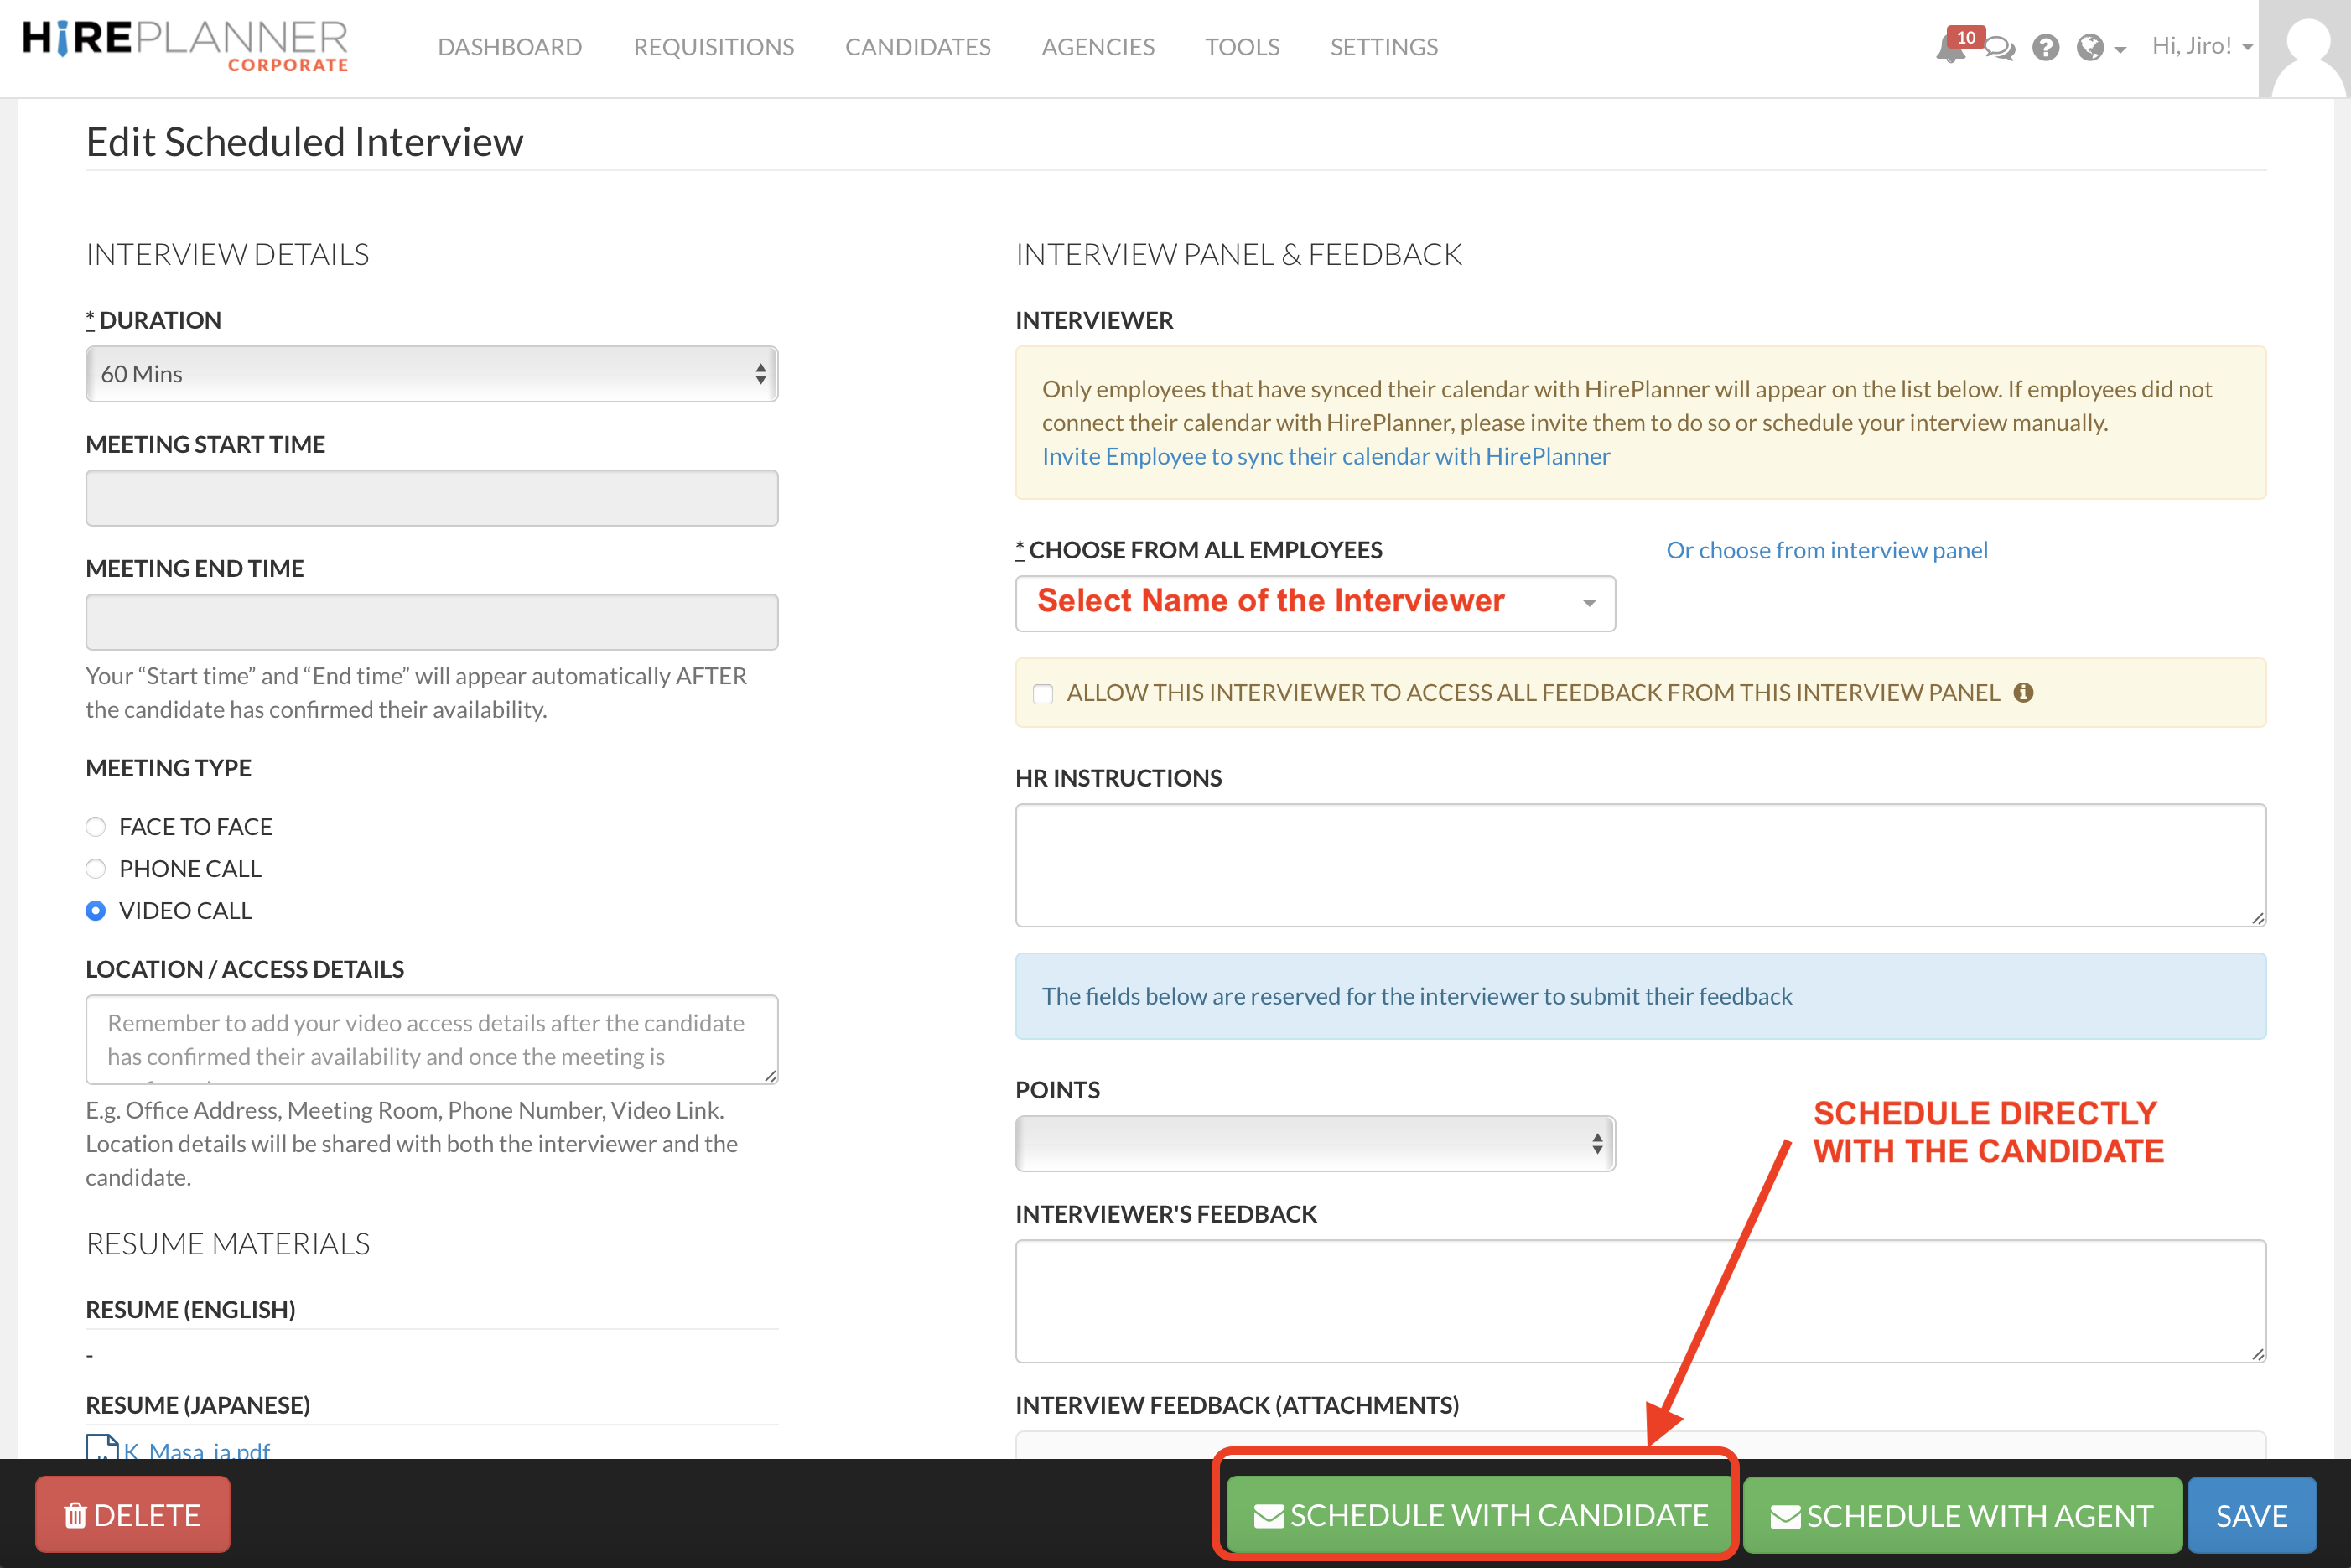
- Select the interviewer(s) who will be meeting the candidate you have selected (2)
Remember that only colleagues who have connected their calendar with HirePlanner will appear on the drop down of interviewers. If you wish to invite someone to connect their calendar with HirePlanner, please see instructions here

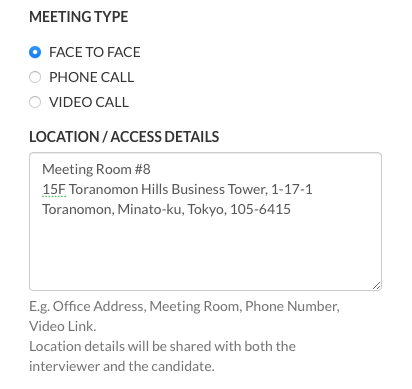
- Select the meeting type (Face to Face, Phone Call, Video Call) (3)
a) Face to Face Meetings: Simply type in the location details as you would like the candidate and the interviewer(s) to see it (Office address, Floor # etc.)
b) Phone Call Meetings: Simply indicate the phone numbers you would like to share with both the interviewer(s) and the candidate
c) Video Call Meeting: For Video calls, you will need to wait until the candidate confirms the meeting time slot before you can add the video access link you wish to share with both the candidate and the interviewer(s).
- Click on "CREATE INTERVIEW"

- Click on the "SCHEDULE WITH CANDIDATE" green button located at the bottom of the page.
STEP 3: SELECT YOUR INTERVIEW TIME SLOTS & SEND INTERVIEW INVITE MESSAGE
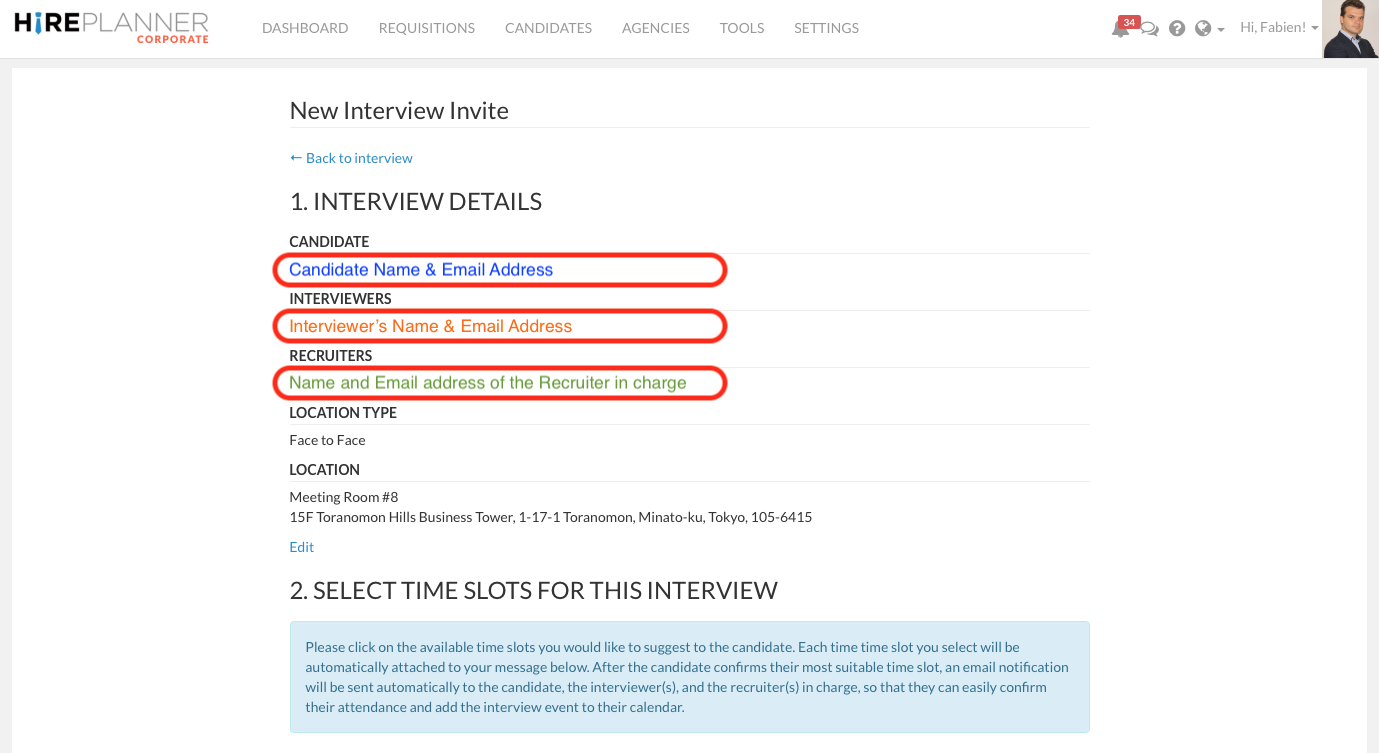
1) VERIFY INTERVIEW DETAILS
Please verify that the name and email address is displayed correctly for the candidate and the interviewer.
IMPORTANT INFORMATION:
- The candidate will receive the email message you are about to send
- The Interviewer will receive a calendar invite automatically shortly after the candidate confirms which time slot is most convenient for him/her.
-The consultant will receive an email notification informing him/her about the interview being confirmed.
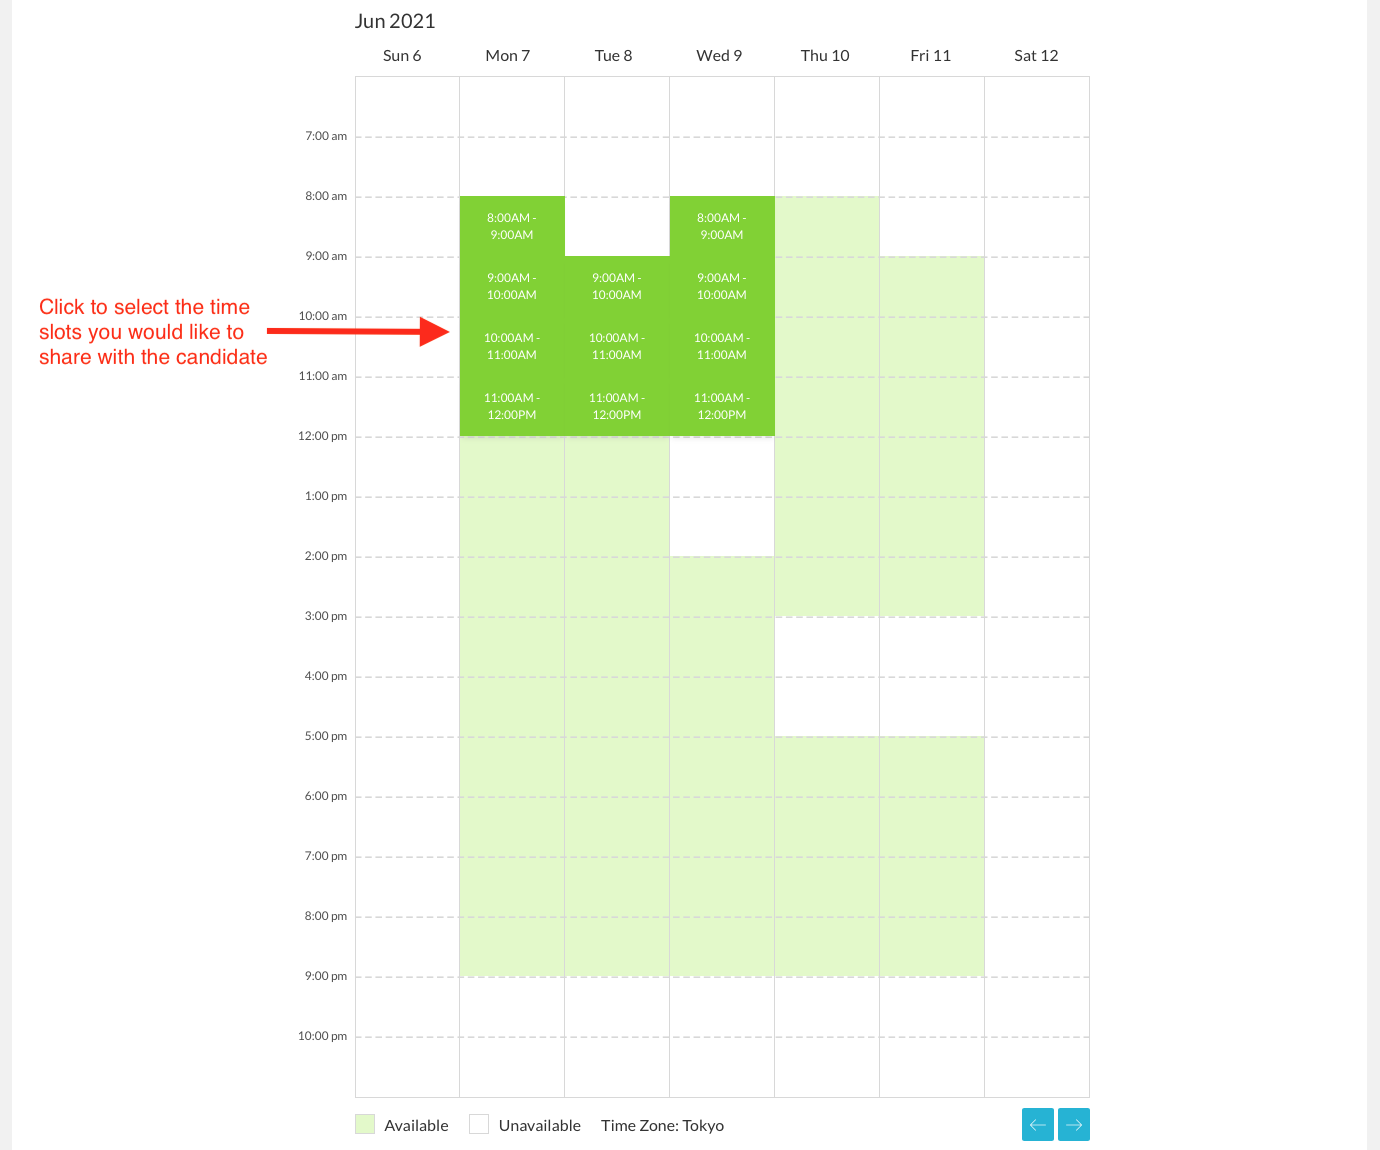
2) SELECT TIME SLOTS FOR THIS INTERVIEW
Click on the green time slots (that indicate the interviewer is available) to select a few availabilities you would like to suggest to the candidate.
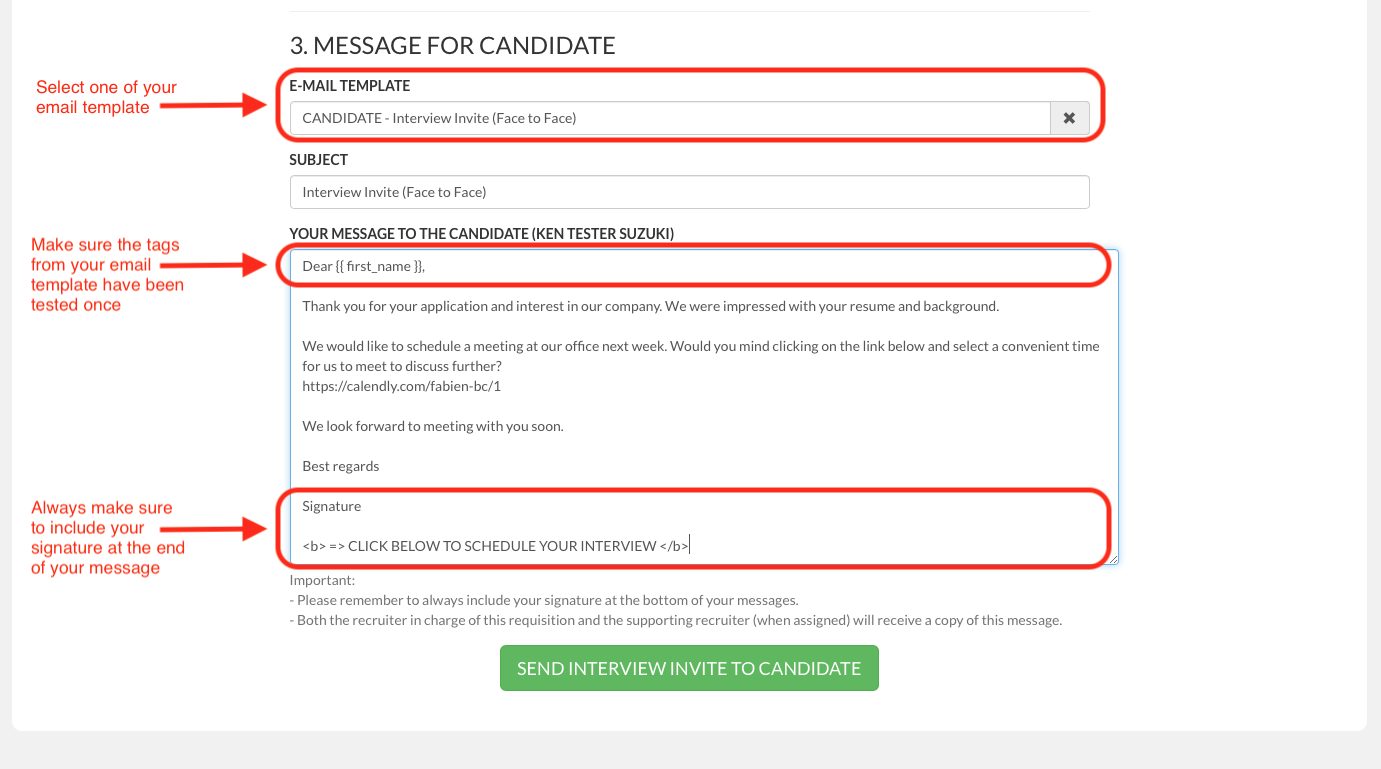
3) MESSAGE FOR CANDIDATE
- Select one of your email templates.
- Make sure all the tags included in your email template are relevant and correct.
- Make sure you have a signature available at the end of your message so that the candidate has no doubt the message comes from you.
- Add the following text at the bottom of your signature to make sure it is easy for the candidate to spot the link to schedule their interview:
<b> => CLICK BELOW TO SCHEDULE YOUR INTERVIEW </b>
4) SEND YOUR INTERVIEW INVITE TO YOUR CANDIDATE
- Click on the "SEND INTERVIEW INVITE TO CANDIDATE" green button.

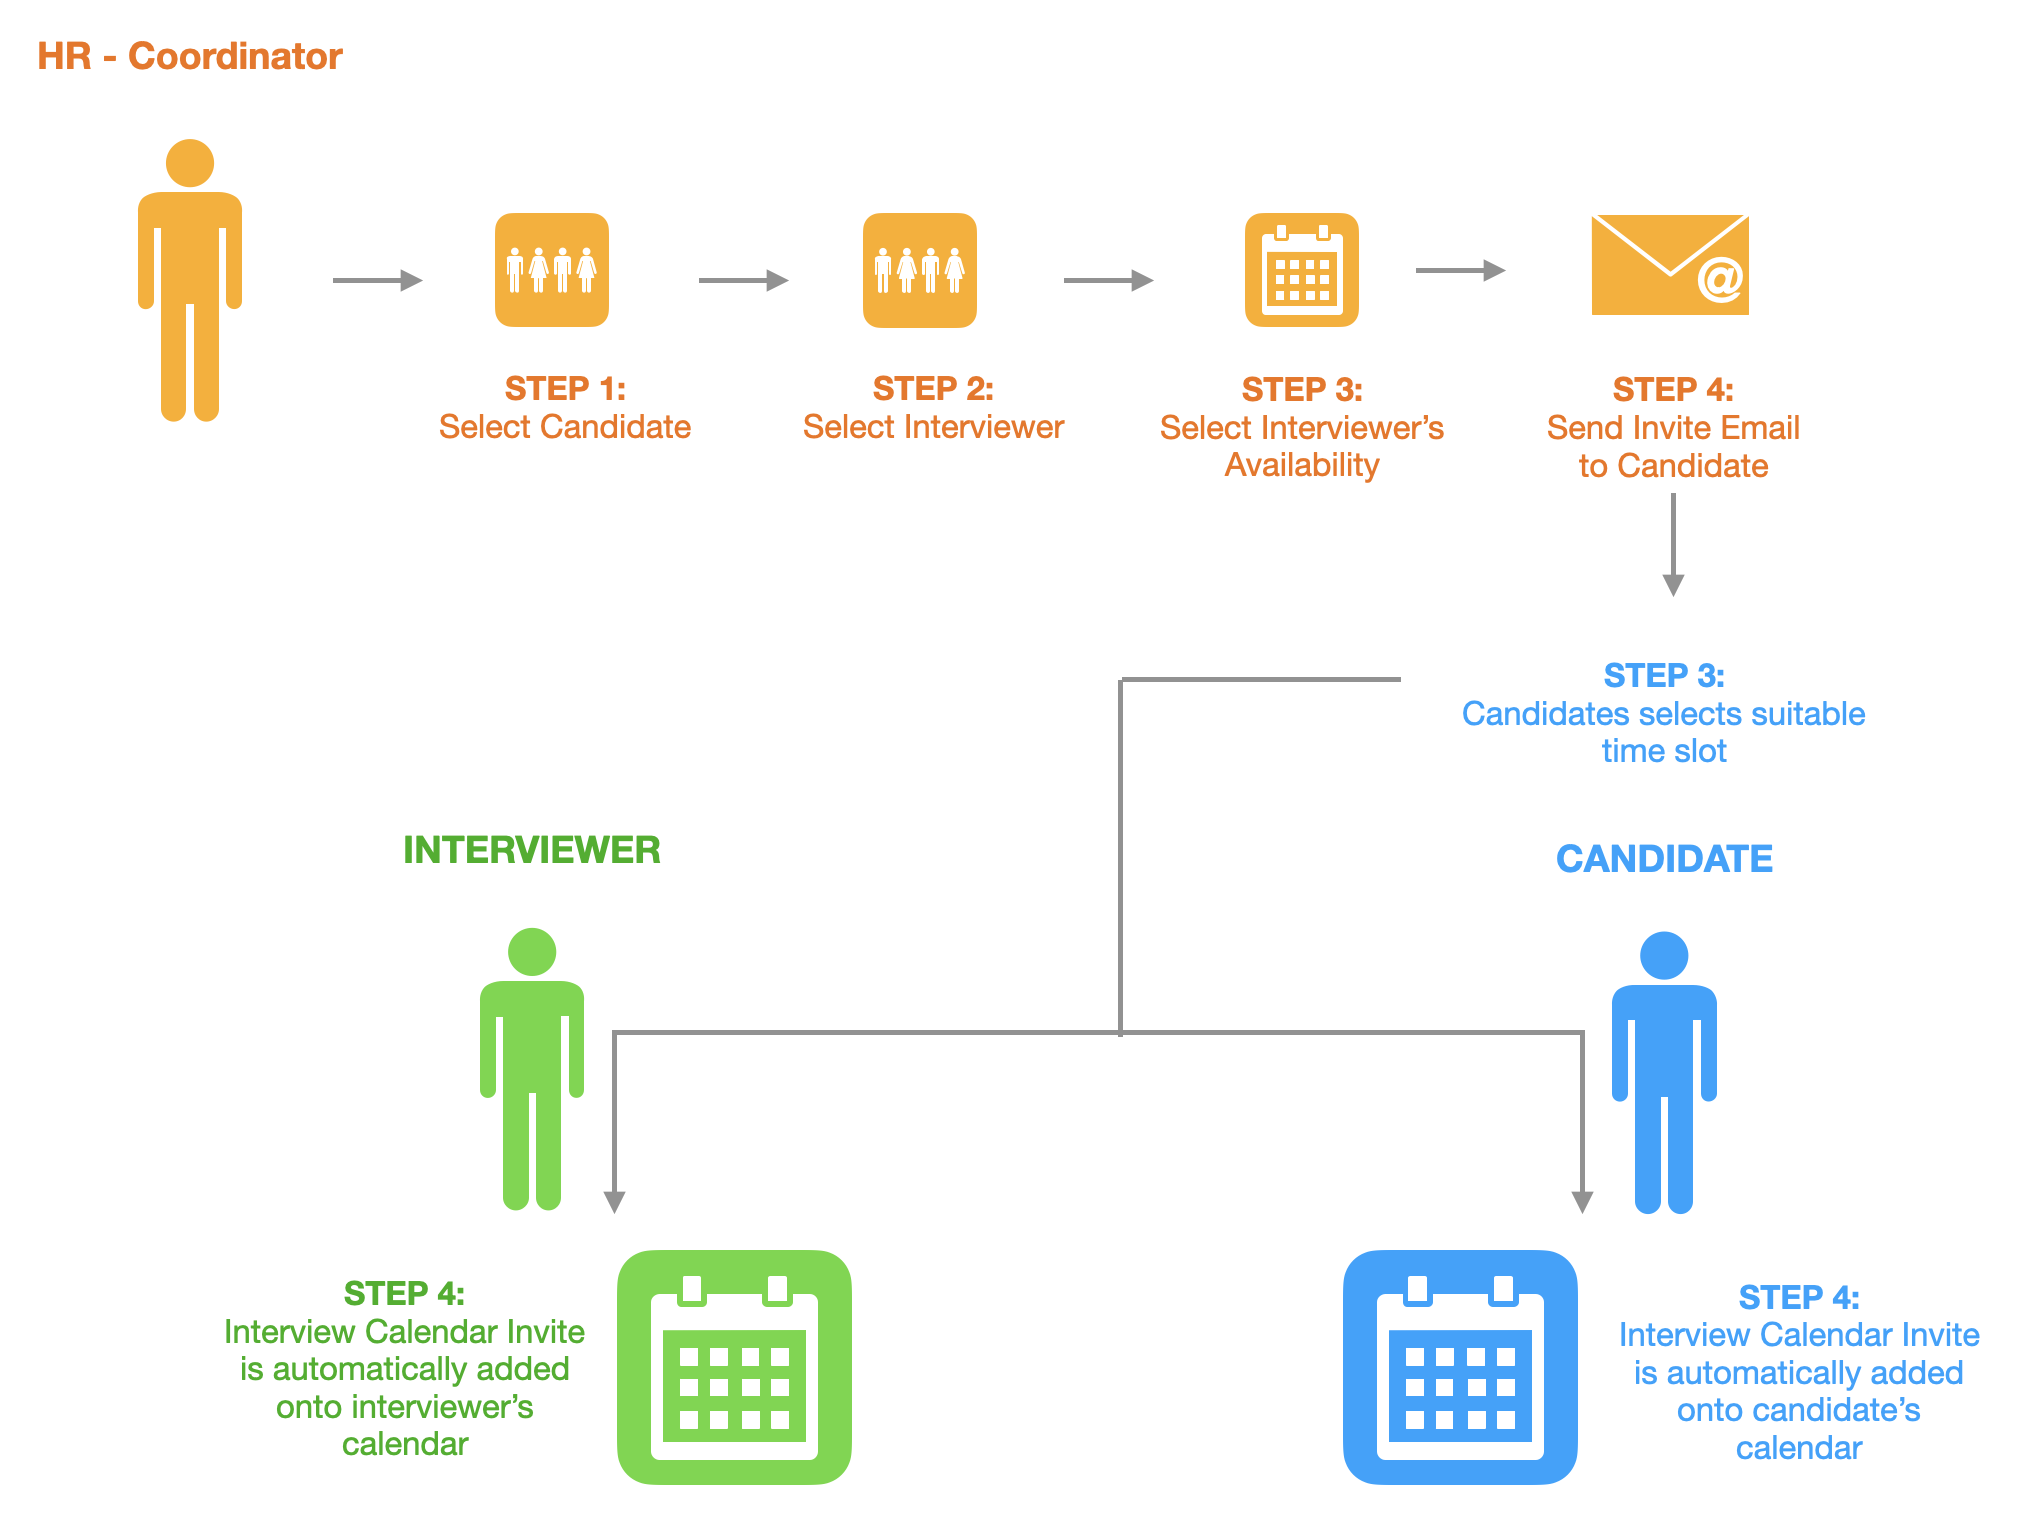
STEP 4: CANDIDATE CONFIRMS INTERVIEW SCHEDULE
After you send the interview invite message, a copy of your message will be onto your communication history (on the application page and the messenger area).
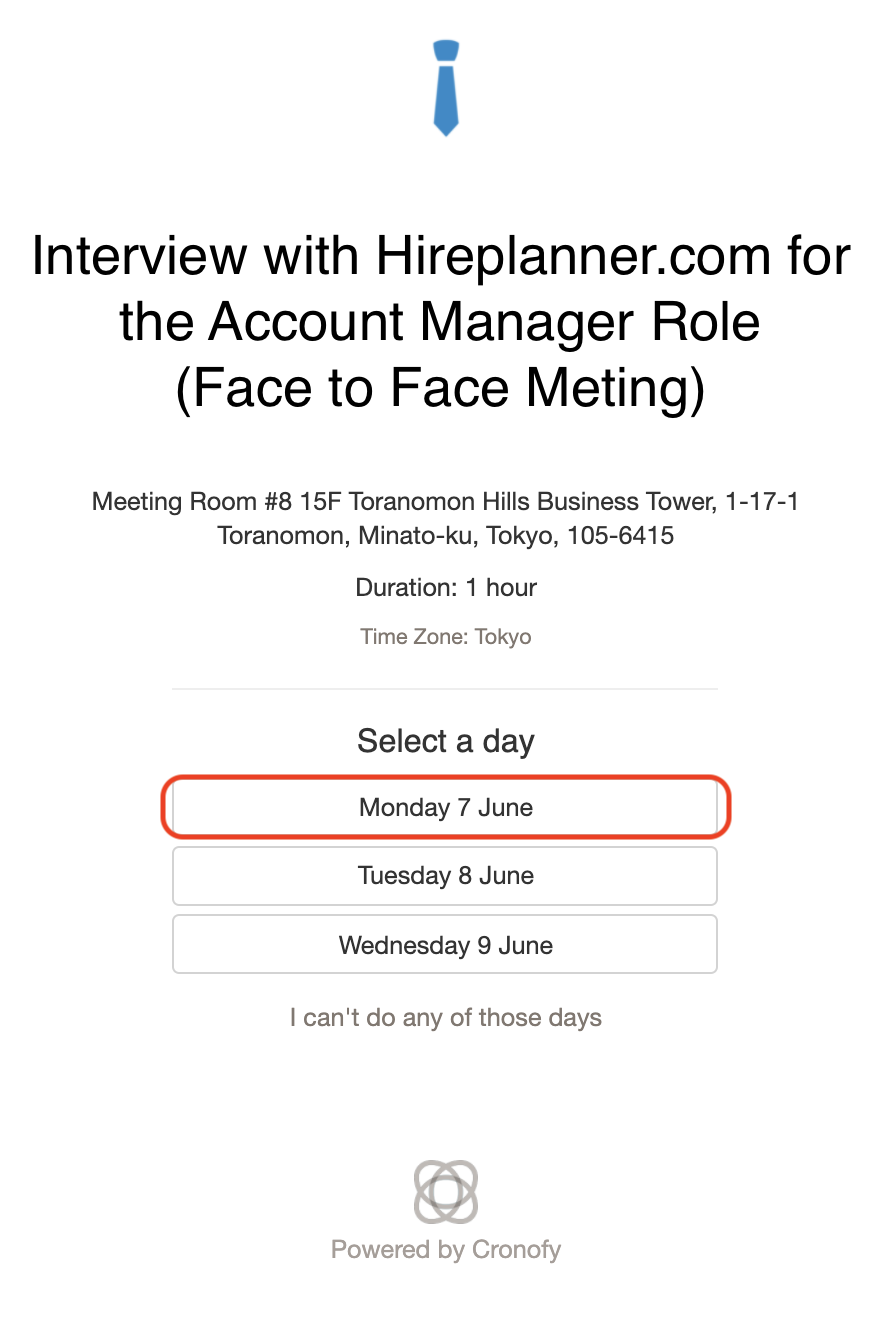
- The candidate will then receive an email notification where he/she will be able to easily confirm the interview schedule by clicking on the link "面接日時を予約 | Schedule Interview" available at the bottom of the email message (see example attached below).
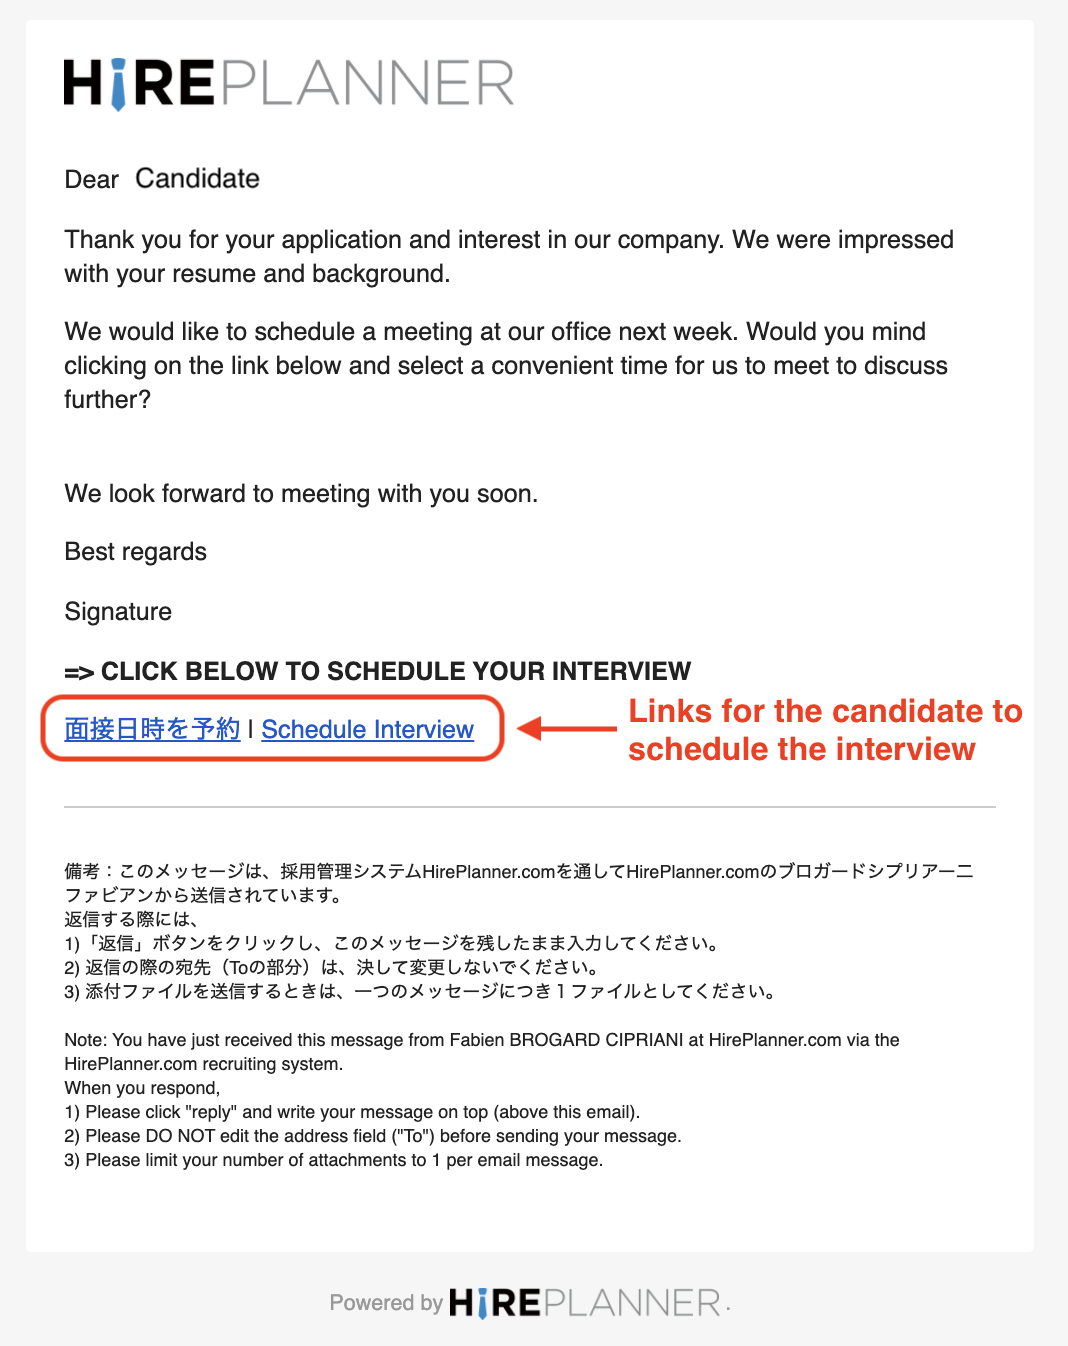
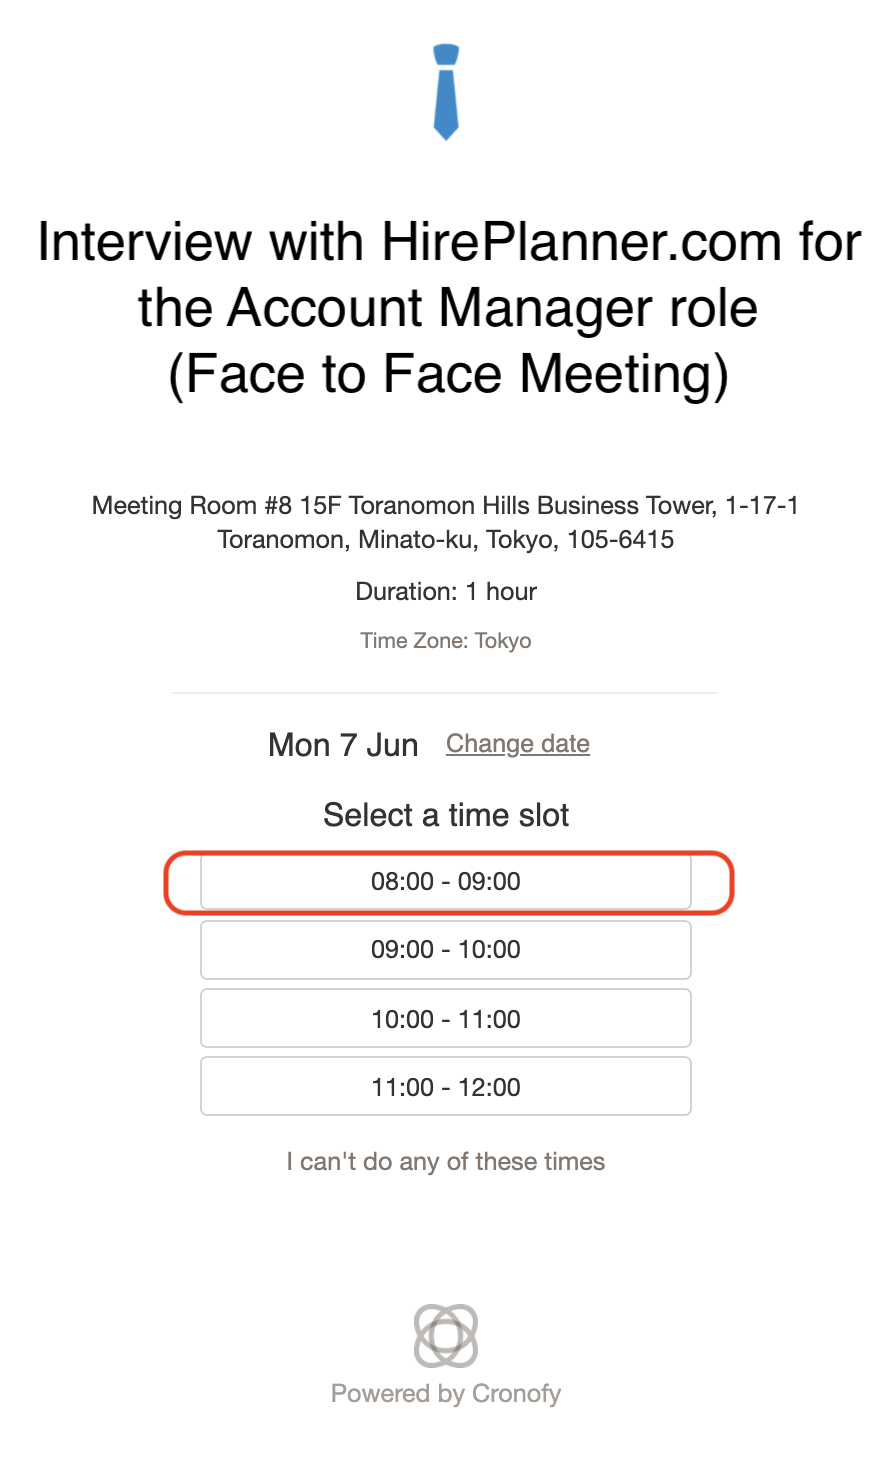
- After clicking on the "Schedule Interview" link, the candidate will be able to visualize the days and times slots that were offered by the coordinator of the interview. All they will need to do is to select the most convenient day and time slot that you offered.
- Once the candidate confirms the day and time slot of the interview, both the candidate and the interviewer will receive a native calendar invite on their schedule.
The calendar invite will look different depending on the provider you are using but it will include the following information:
- Name and email address of the Interviewer
- Name and email address of the candidate
- Link to access all the details about the interview (Location details, Job Description etc.)

When the candidate or the interviewer click on the link in their calendar invite, they will be able to access the following page.
- The left side of the page contains data that's important for the candidate such as:
- The schedule
- The Location
- The Interviewer(s)
- The job description etc.
- The right side will provide a secure link to the interviewer so that they can access the candidate resume details along with an interview feedback form.

!!! LOCATION FIELD FOR VIDEO INTERVIEWS !!!
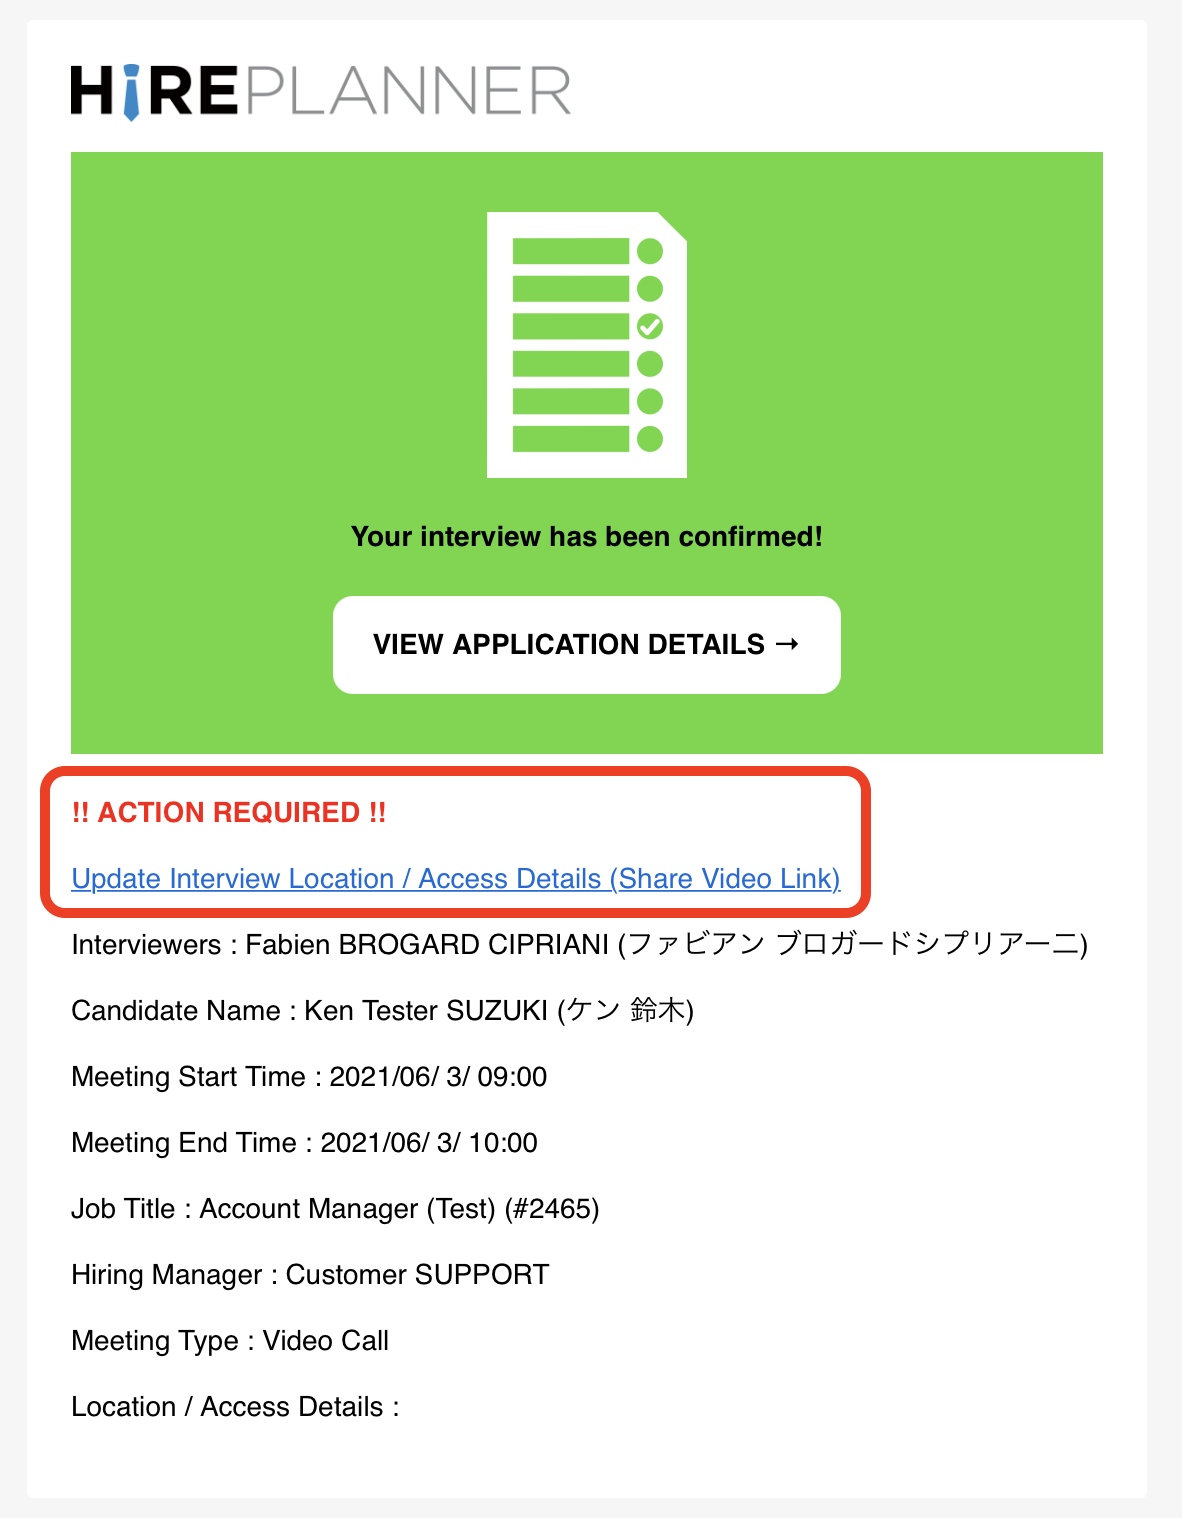
For video calls, after a candidate confirms their interview schedule, you will receive an email notification to remind you to add the video link details onto the location field of the interview record.
PLEASE REMEMBER TO ALWAYS ADD THE VIDEO ACCESS LINK ONTO YOUR LOCATION FIELD ON YOUR INTERVIEW RECORD AS SOON AS YOUR RECEIVE THE CONFIRMATION FROM THE CANDIDATE. IF YOU DO NOT UPDATE THE LOCATION FIELD, THE CANDIDATE WILL NOT BE ABLE TO ACCESS THE VIDEO ACCESS LINK ON THE DAY OF THE INTERVIEW.
Comments
0 comments
Please sign in to leave a comment.